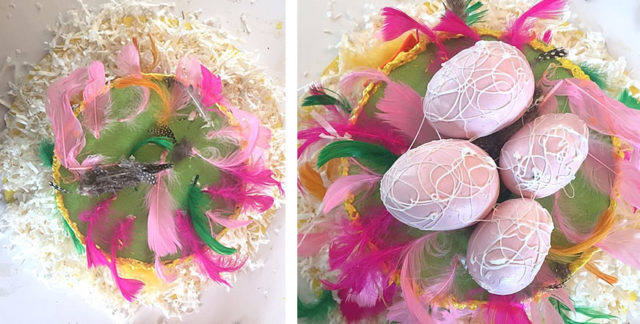
A great Easter tradition every year is the Easter Bonnet parade!
Children decorate their own bonnets or hats with lots of festive bunnies and eggs.Nowadays you can buy little straw hats to decorate, but here we’re going to show you how to turn some card, papers and felt into a very homemade bonnet from scratch.
We share this wonderful craft idea from Crafty Arts, who have kept all in the “Friend” office thrilled with their creations.
What you will need:
Large piece of yellow card (A2 size)
Coloured felt
Eggs (polystyrene or papier mache)
Feathers
Shredded tissue paper
Paints
Glue
Pencil
2 plates (1 large, 1 small for circle stencils)
Scissors
Now to begin:
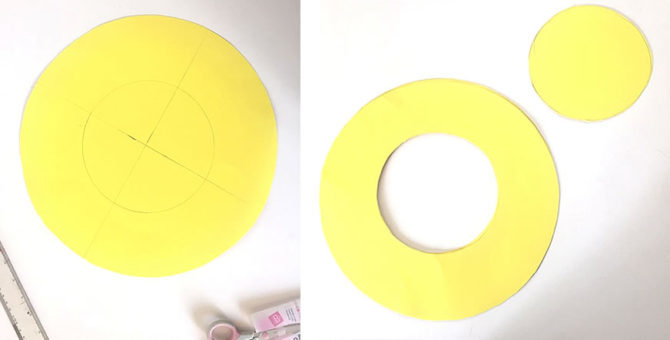
1. Use the plates to create the hat stencil. The larger circle forms the brim of your hat, and the smaller one forms the top of your hat.
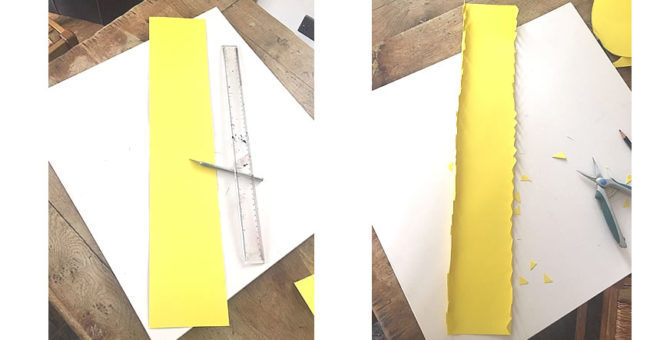
2. Then cut a long strip of paper that is slightly longer than the circumference of the smaller circle (add an extra centimetre which will form a tab to stick both ends together). The thickness of your strip depends on how high you want your hat to be. Draw it out and then add an extra centimetre to each long side too.
3. Starting from the outer edges, cut teeth-shaped notches into the additional centimetre strips. These form tabs to help you stick the strip to your hat brim and top.
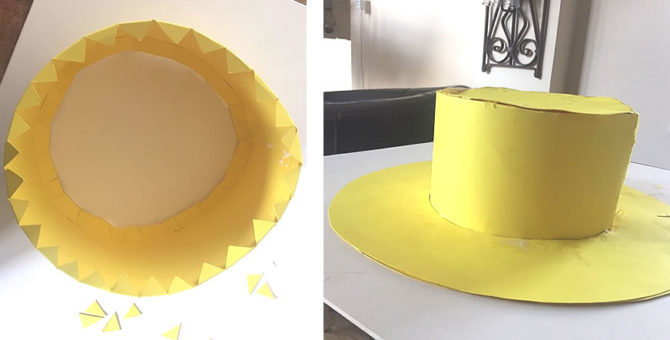
4. Bring the two ends of your strip together and glue in place using your extra centimetre tab. Then fold in the teeth and glue the bottom teeth to the brim and the top teeth to the top circle of your hat.
5. Now for the fun part, the decorating. You can go to town with your bonnet, sticking feathers and eggs everywhere. We put a base of green felt on the top of the hat for the eggs to sit on, and we also added the shredded tissue around the brim to make it look like an Easter nest. We then used Tulip paint to create patterns on our polystyrene Easter Eggs for the finishing touches, but you can use any kind of paints and colours you like.
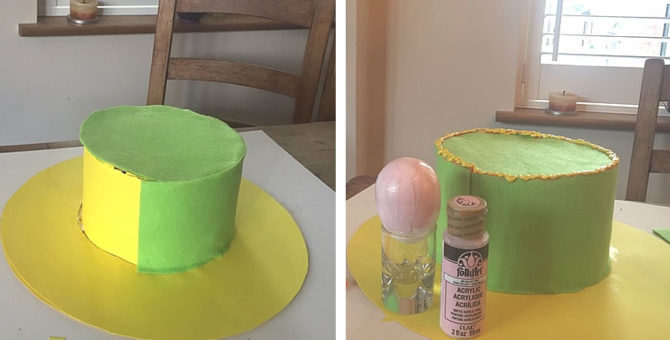
Tip: Painting eggs can be tricky. You can sit them inside a jar or glass while you paint, or if you’re using polystyrene eggs you can put them on a cocktail stick or wooden skewer.
